Add Employee Information

After registering, you have 30 days to upload your eligible employee roster. As you hire new eligible employees, you'll also need to add them to your roster within 30 days of their hire date.

Looking for a more hands-off approach?

Payroll integration options can help automate the ongoing tasks of sending contributions and making updates when employees update their contribution rates.

Learn More

Employee Eligibility and Requirements for the Program

Employees are eligible for CalSavers if they:

  • Receive California wages.
  • Are 18 years of age or older.
  • Have a valid Social Security Number (SSN) or Individual Taxpayer Identification Number (ITIN).
  • Have been employed for at least 30 days; no minimum number of hours required.

You’ll need the following information for all eligible employees:

  • Social Security Number (SSN) or Individual Taxpayer Identification Number (ITIN)

  • First & last name

  • Birthdate

  • Physical address

  • Phone number

  • Email address (if available)

    Email is preferred because it provides faster electronic communication and reduces paper mail delays.

Did you know that employees may qualify for a Saver's Tax Credit?

Share information about the Saver's Tax Credit to help eligible employees make the most of their retirement savings.

How to Add Your Employee Roster

Set Up Pay Schedules

Create a pay schedule for your employees. If employees have different schedules, such as hourly and salaried employees, create a schedule for each group.

Watch a video on how to set up pay schedules manually

1

Get Started in the Employer Portal

  1. Log in to the Employer Portal.
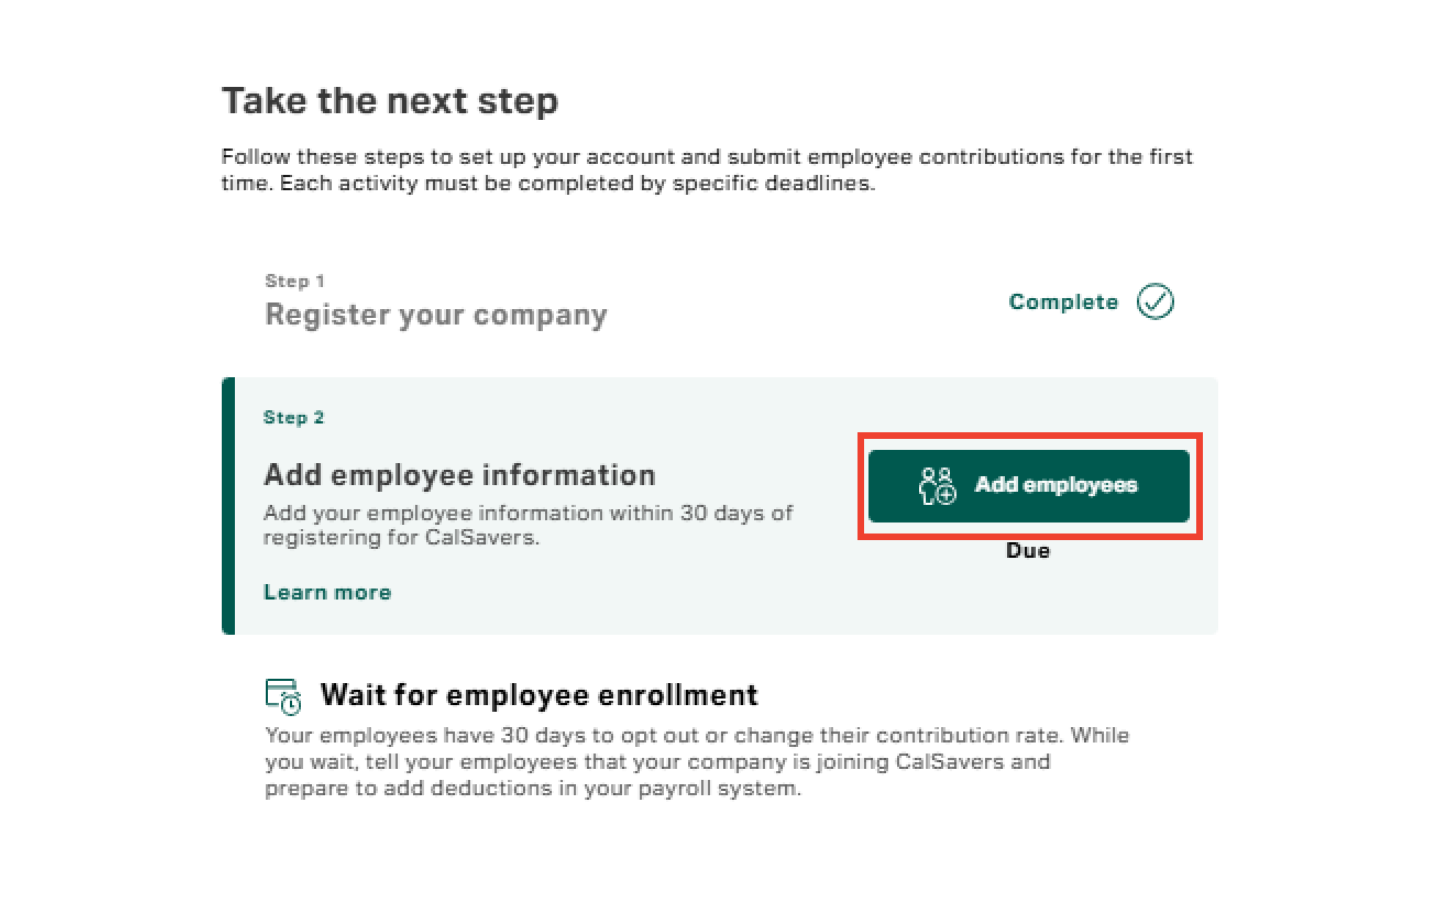
  2. Go to Step 2 – Add employee information.
  3. Select Add employees.
  4. Choose your method (Upload file or Add manually).
  5. Click Next.
Log In
Add employees button on the Employer Portal dashboard

2

Create a New Pay Schedule

  1. Select a pay schedule group from the dropdown menu.
  2. Click Create New Pay Schedule.

Tip: You can return later to create additional schedules if needed.
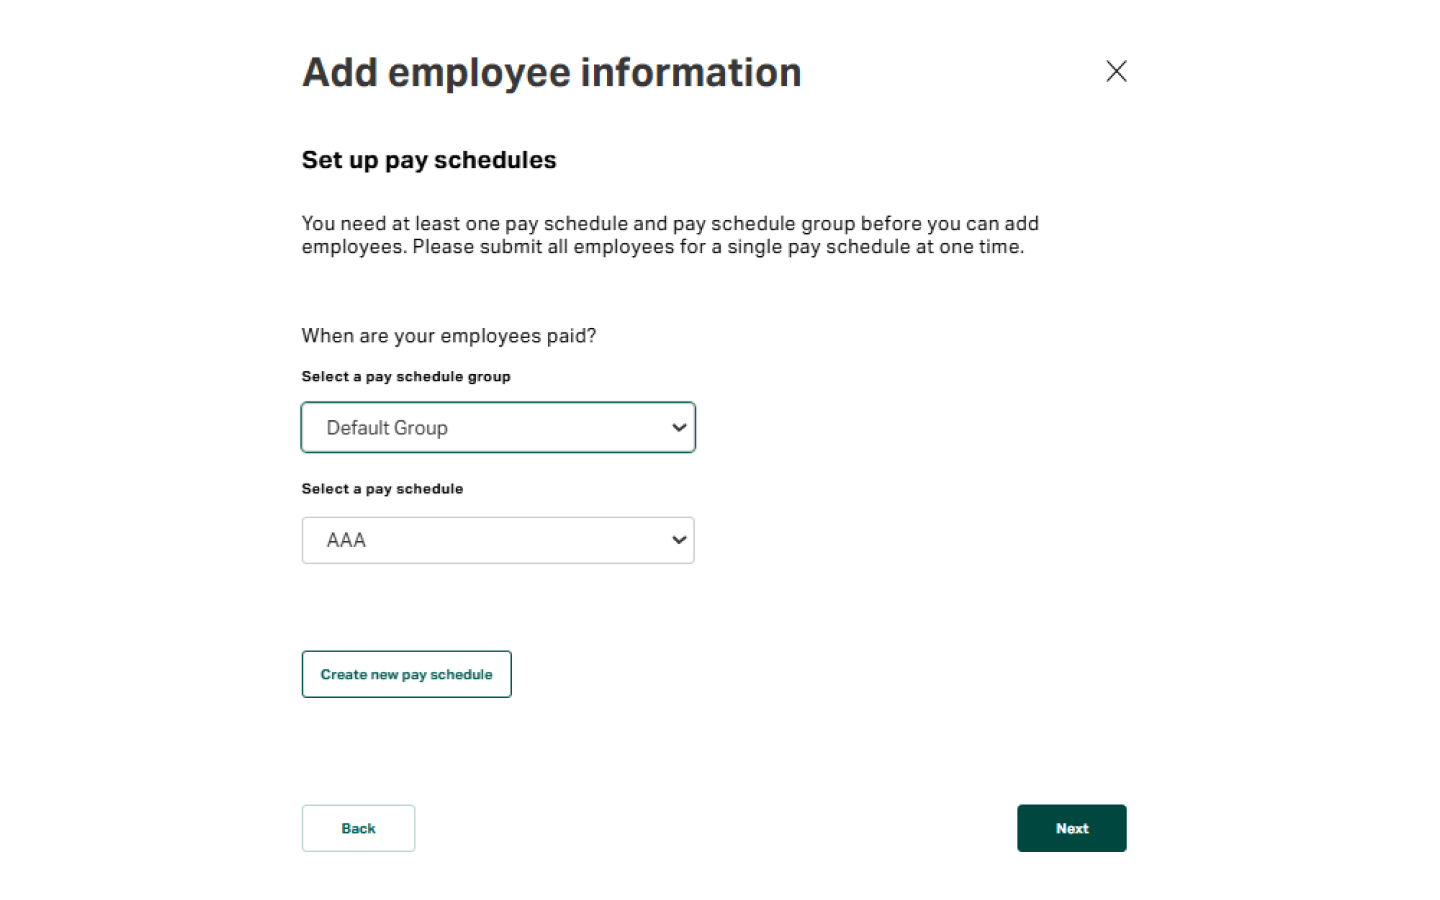
Select a pay schedule group and create a new pay schedule

3

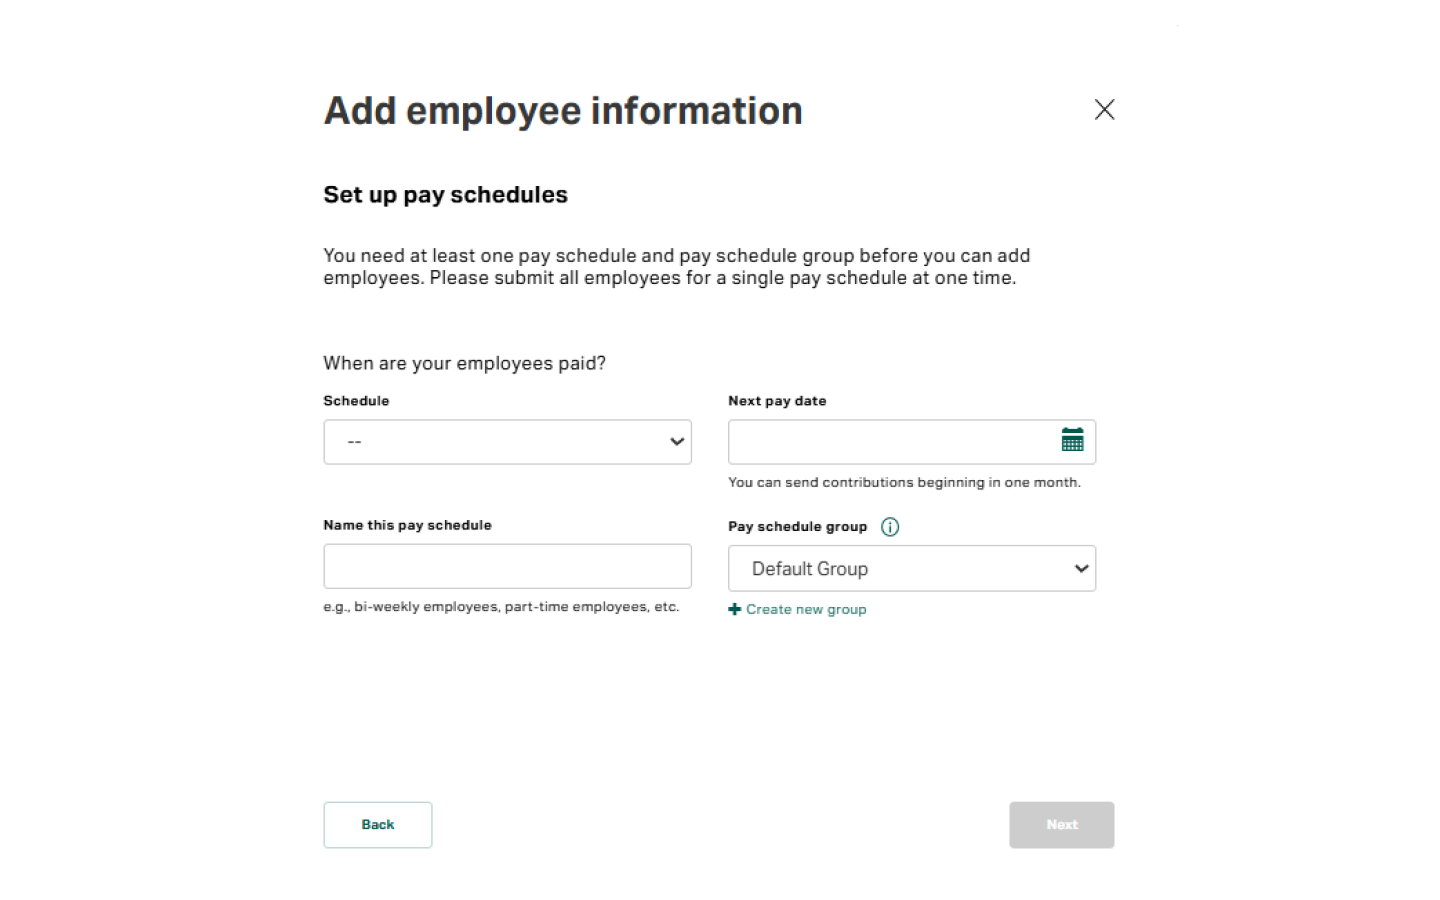
Define Schedule Details

  1. Choose the pay frequency from the Schedule dropdown.
  2. Use the calendar to select the next pay date.
  3. Enter a name for the pay schedule and pay schedule group.
  4. Click Next and proceed to add your employees by using the file upload or manual process.
Set up pay schedule details

4

Add Additional Schedules (If Needed)

  1. Repeat the process to create more schedules for other employee groups.
  2. Ensure employees are assigned to the correct pay schedule before continuing.
Recommended for 10 or More Employees

Instructions for File Upload

Watch a video on how to upload your employee roster file

Download Excel Template

1

Log In and Start Add Employee Process

  1. Log in to the Employer Portal.
  2. Go to Step 2 – Add employee information.
  3. Click Add employees.
  4. Select Upload file and click Next.
Log In
Log in and start the add employee process in the Employer Portal

2

Select a Pay Schedule

  1. Select the desired pay schedule group and pay schedule from the dropdown menus.
  2. Click Next.
  3. Review the on-screen upload instructions.
Select a pay schedule from the dropdown menu

3

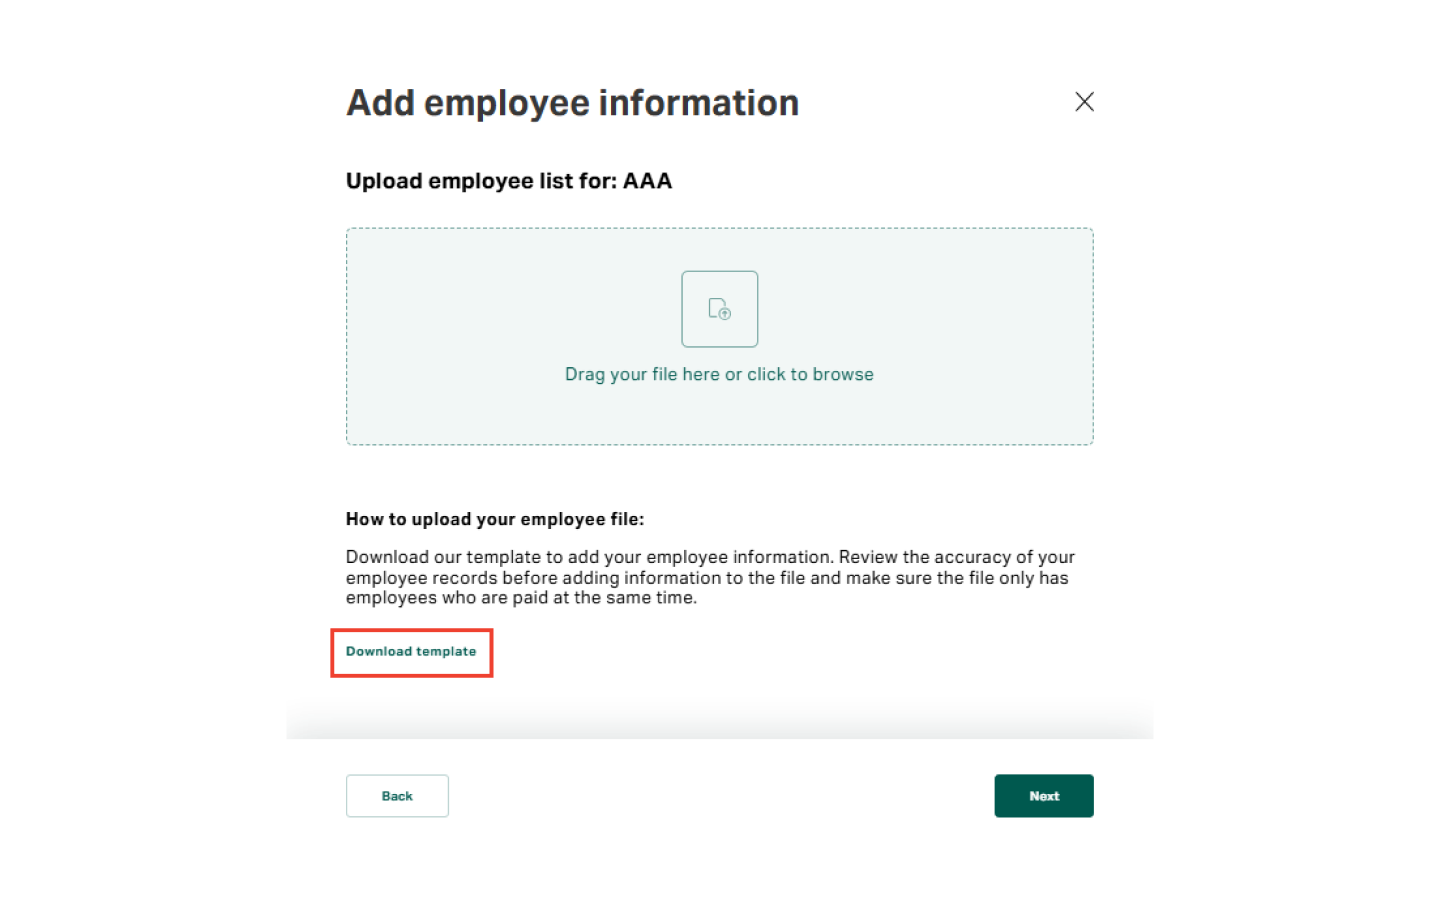
Download Template

  1. Download the template and open the Excel file.
  2. For guidance on required fields, review “formatting examples” tab. For detailed instructions, see tips for using the file upload template.
Download Excel Template
Download and prepare the Excel employee upload template

4

Enter Employee Information

  1. Go to the "Payroll Census" tab.
  2. Select Enable Editing and enter your employee information.
  3. Complete all required fields marked with an asterisk (*).
    Include an email address, if available.
  4. Save your completed file.

Warning! Do not change the template's columns, widths, or structure. Changes may trigger a file error when uploaded, and cause processing delays. Tips for using the file upload template.
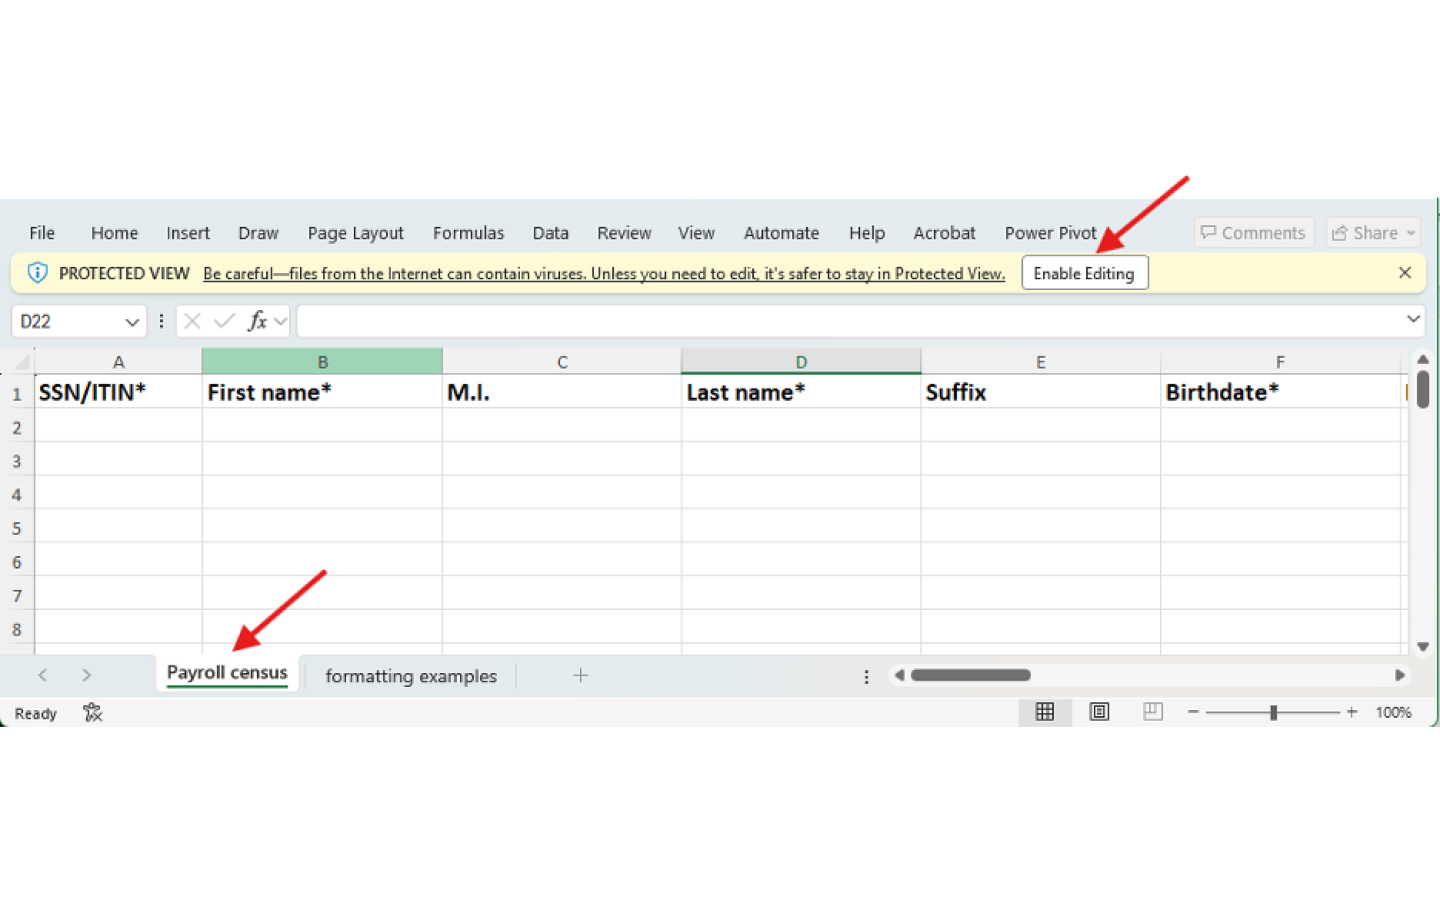
Enter employee information in the payroll census file

5

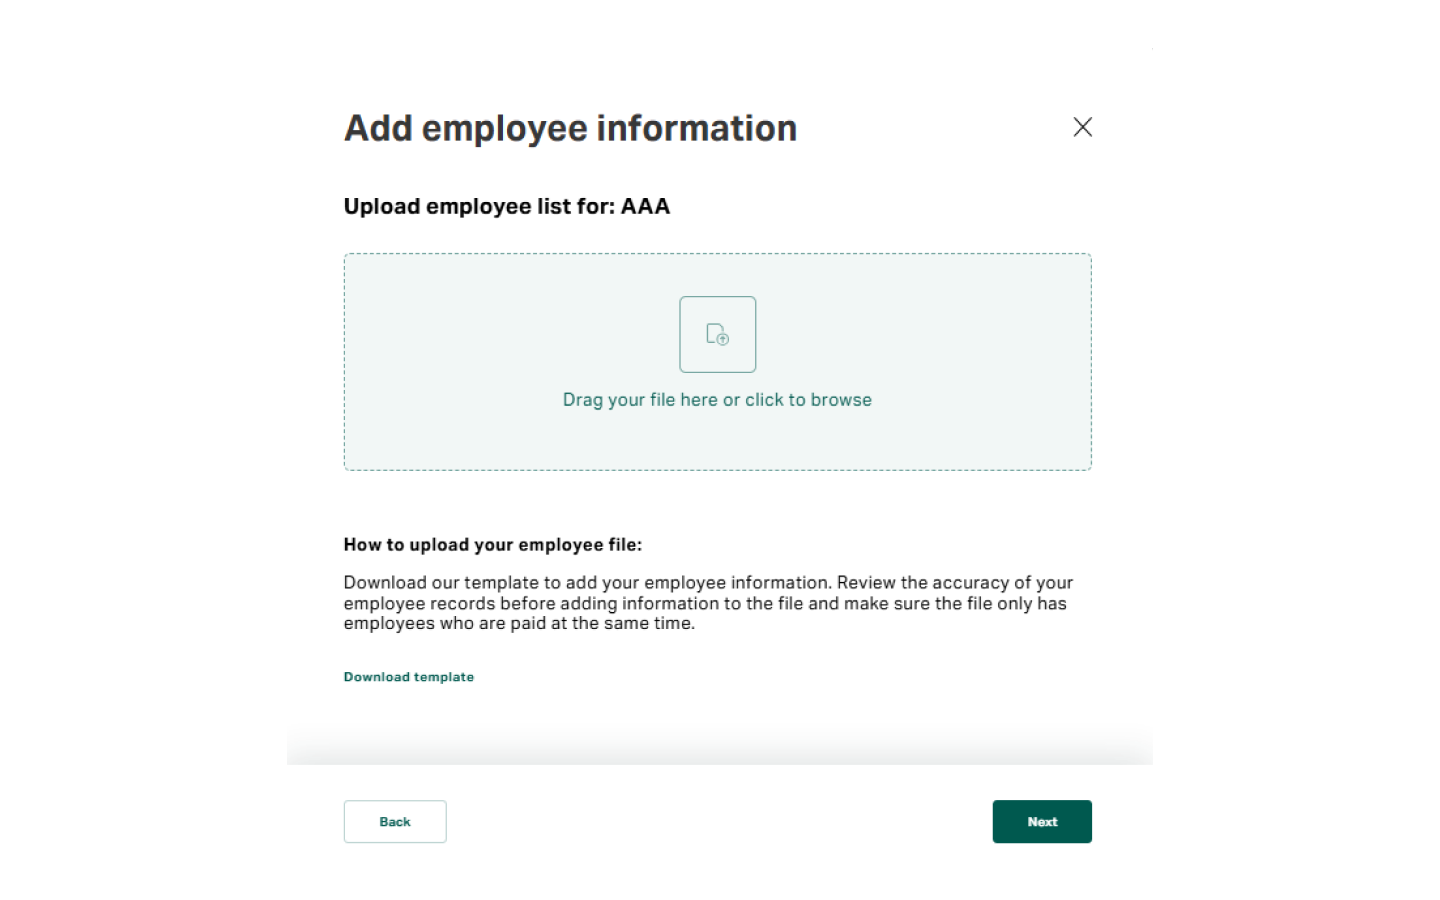
Upload File in the Portal

  1. Return to the Employer Portal.
  2. Drag and drop your file or click Browse to upload.
  3. Click Next.
Upload the completed employee payroll file in the Employer Portal

6

Review & Resolve Errors (If Any)

  1. Review your employee list under Employees for accuracy.
  2. Confirm employees are on the correct pay schedule.
  3. If errors occur:
    • Compare your file to the template formatting.
    • Correct and re-upload as needed.
    • Contact Client Services at 1-855-650-6916 if issues persist.

What Happens Next:

After you add your employee information, CalSavers will send your employees a welcome packet by email or mail, initiating their 30-day decision period. During this time, employees can register and customize their account settings or opt out.

While you wait, you should:

Recommended for Less Than 10 Employees

Instructions for Manual Entry

Watch a video on how to manually add your employees

1

Log In and Start Add Employee Process

  1. Log in to the Employer Portal.
  2. Go to Step 2 – Add employee information.
  3. Click Add employees.
  4. Select Add manually.
  5. Click Next.
Log In
Log in and start the add employee process in the Employer Portal

2

Select a Pay Schedule

  1. Select the desired pay schedule group and pay schedule from the dropdown menus.
  2. Click Next.
Select a pay schedule from the dropdown menu

3

Enter, Review & Submit Employees

  1. Enter the required information for each eligible employee.
  2. Include an email address, if available.
  3. Review all information for this payroll group for accuracy and completeness.
  4. Click Finish and Submit.

Optional: Download a copy of the employee list for your records.

Warning! To avoid losing your work, do not navigate from this screen until it’s submitted.
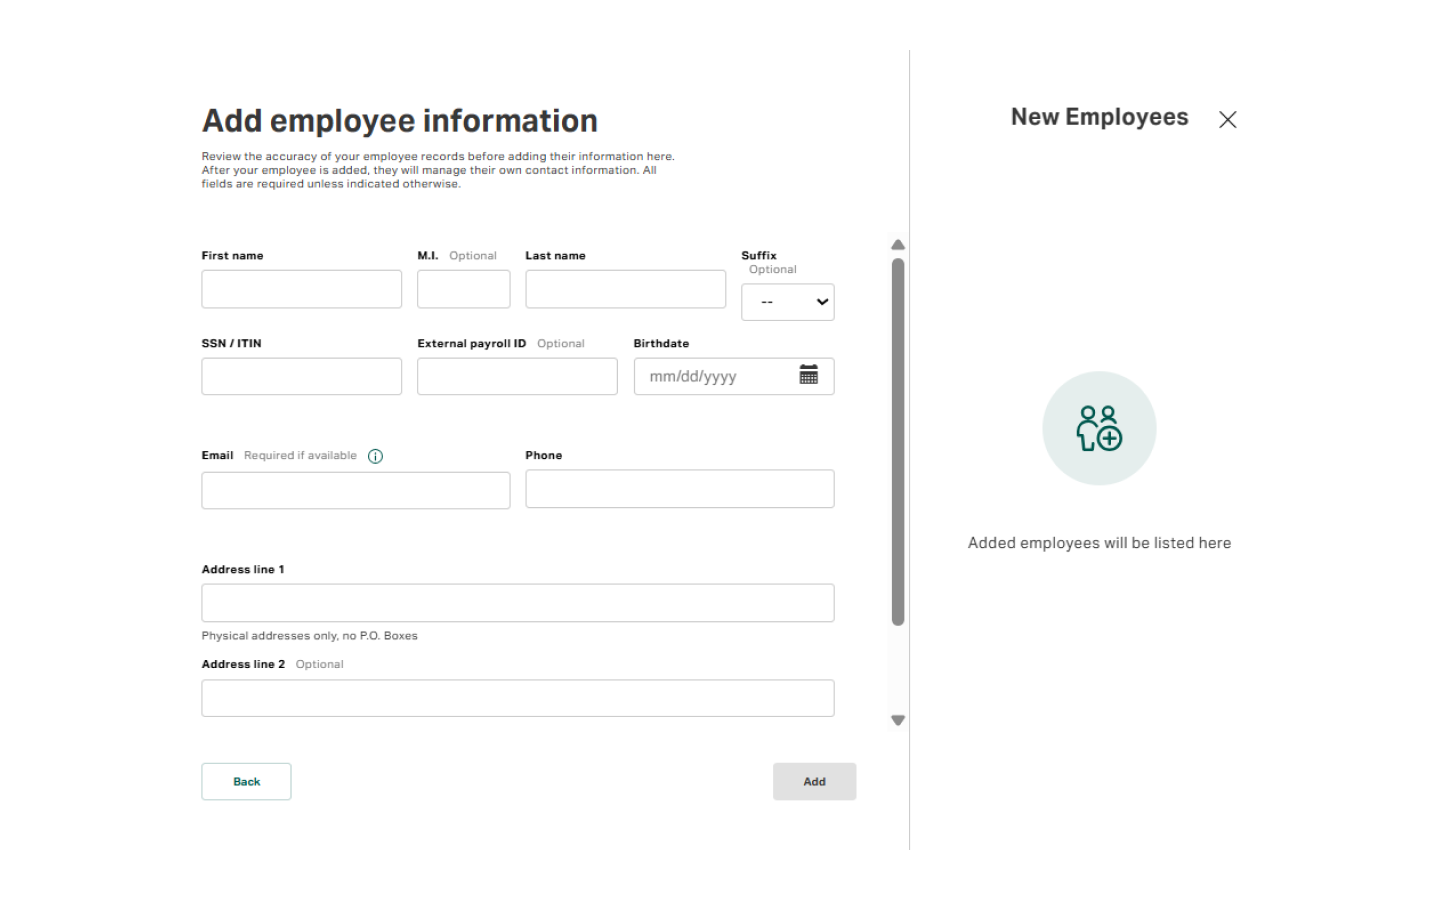
Enter, review, and submit employee details manually

What Happens Next:

After you add your employee information, CalSavers will send your employees a welcome packet by email or mail, initiating their 30-day decision period. During this time, employees can register and customize their account settings or opt out.

While you wait, you should:

Frequently Asked Questions

A pay schedule is a term used to describe how frequently your employees are paid (ex. weekly, bi-weekly, monthly).

A pay schedule group is an additional (optional) way to group your employees (i.e., like a folder).

With automatic enrollment, eligible employees who do not choose to opt out will be enrolled automatically in the program.

Employers facilitating the CalSavers program are required by law to provide information on all eligible employees to the program.

Employees who do not want to participate can opt out. The easiest way to opt out is either by calling our automated phone system at (855) 650-6918 or through our website.

All employees of a participating employer are eligible as long as they are at least age eighteen and have the status of an employee under California law. The program has no minimum requirements based on hours worked or tenure with the employer.

Need additional support?

Chat with CalSavvy

Chat with CalSavvy

Get answers to questions about CalSavers, from registration to administration.

Employer FAQs

Employer FAQs

For more information about running CalSavers visit our FAQ page.